Strawberry Crunch Cheesecake Tacos – No-Bake Summer Dessert
Introduction
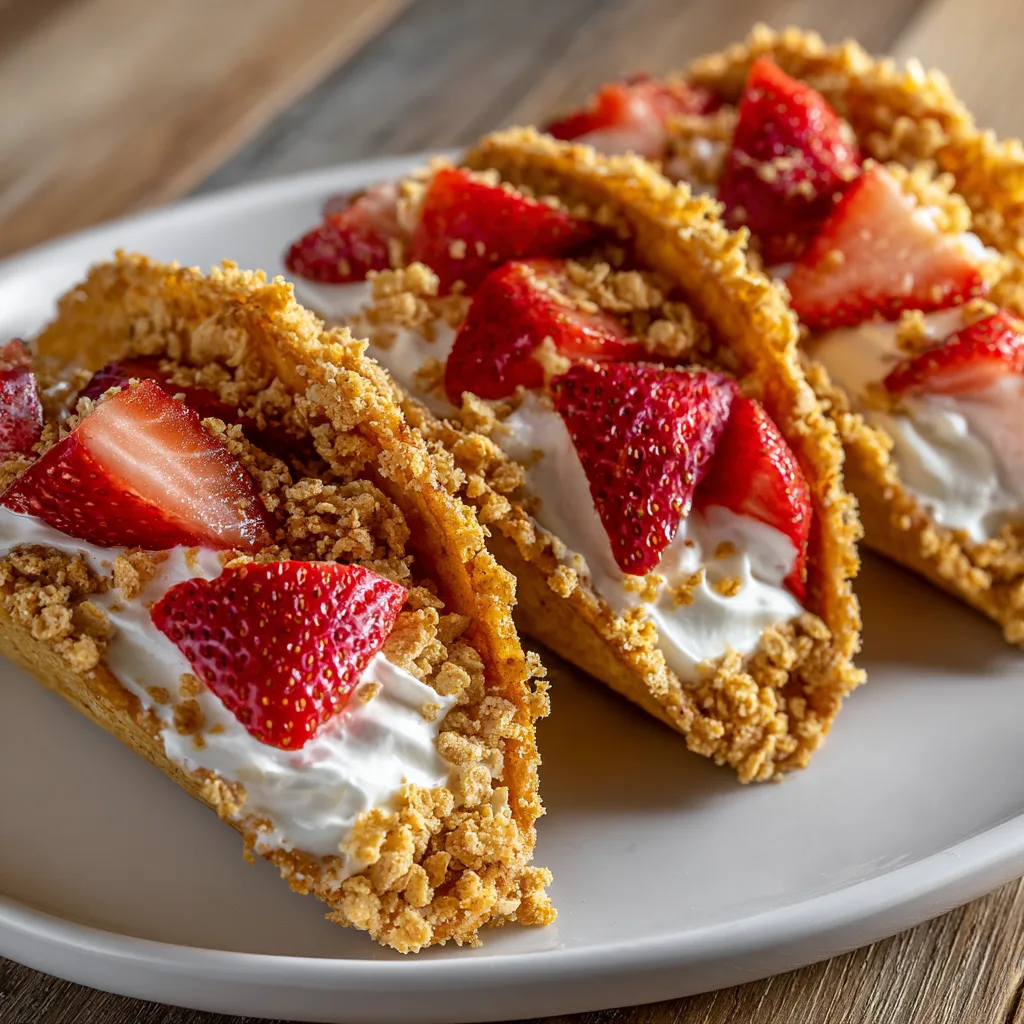
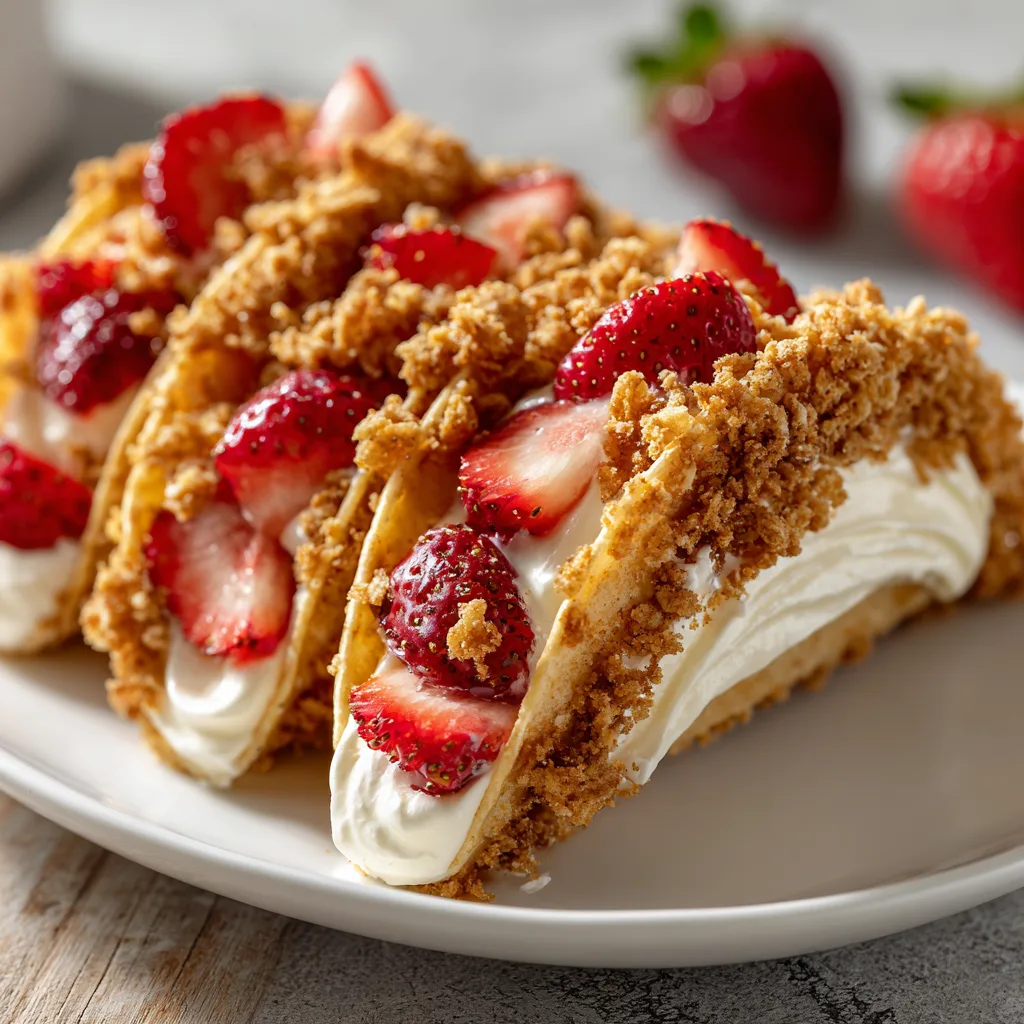
If you’re looking for a dessert that’s equal parts fun, pretty, and absolutely delicious, these Strawberry Crunch Cheesecake Tacos are about to become your new favorite treat. 🍓 Strawberry Crunch Cheesecake Tacos – No-Bake Summer Dessert ,Imagine creamy no-bake cheesecake filling, fresh juicy strawberries, and a nostalgic crunchy topping tucked inside a crispy golden taco shell. These dessert tacos are not only easy to make but also perfect for summer parties, birthdays, or anytime you want to wow guests without turning on the oven.
The best part? This recipe is completely customizable. You can stick to the classic strawberry flavor, or swap in blueberries, raspberries, or even Oreos for a different twist. Whether you’re hosting a backyard BBQ or planning a fun dessert night with kids, these cheesecake tacos will steal the show.

Strawberry Crunch Cheesecake Tacos
Ingredients
Equipment
Method
- Preheat oven to 375°F (190°C). Brush tortillas with melted butter and sprinkle with cinnamon sugar. Drape over muffin tin or taco rack. Bake 8–10 minutes until crisp. Cool completely.
- In a bowl, beat softened cream cheese until smooth. Add powdered sugar and vanilla. Mix until combined. Fold in whipped cream until fluffy. Transfer to a piping bag.
- In a food processor, crush Golden Oreos and freeze-dried strawberries. Stir in melted butter until crumbly. Set aside.
- Pipe cheesecake filling into cooled taco shells. Top with diced strawberries and sprinkle with strawberry crunch topping. Garnish with whipped cream if desired.
Notes
Why You’ll Love This Recipe
- No-bake cheesecake filling – light, creamy, and rich without needing the oven.
- Crispy taco shells – brushed with butter, dusted in cinnamon sugar, and baked until golden.
- Strawberry crunch topping – inspired by the classic ice cream bar coating.
- Fun & customizable – switch up the fruit, drizzle with chocolate, or add sprinkles for kids.
- Make-ahead friendly – you can prep the filling and topping in advance, then assemble when ready to serve.
Ingredients You’ll Need
Here’s a breakdown of what makes these cheesecake tacos shine:
For the Taco Shells:
- Small flour tortillas
- Melted butter
- Cinnamon sugar
For the Cheesecake Filling:

- Cream cheese (softened)
- Heavy cream or whipped topping
- Powdered sugar
- Vanilla extract
For the Strawberry Crunch Topping:
- Golden Oreos (crushed)
- Freeze-dried strawberries (crushed)
- Butter (melted)
For the Topping:
- Fresh strawberries (diced)
- Whipped cream (optional, for garnish)
Step-by-Step Instructions
1. Prepare the Taco Shells
- Preheat your oven to 375°F (190°C).
- Lightly brush flour tortillas with melted butter, sprinkle generously with cinnamon sugar, and drape them over the rungs of an upside-down muffin tin or taco rack.
- Bake for about 8–10 minutes, or until golden and crisp. Let them cool completely to hold their shape.
2. Make the No-Bake Cheesecake Filling
- In a mixing bowl, beat softened cream cheese until smooth and creamy.
- Add powdered sugar and vanilla, mixing until combined.
- Gently fold in whipped cream (or whipped topping) until fluffy.
- Transfer the filling into a piping bag for easy assembly.
3. Prepare the Strawberry Crunch Topping
- In a food processor or sealed bag, crush Golden Oreos and freeze-dried strawberries.
- Stir in melted butter until the mixture resembles coarse crumbs. Set aside.
4. Assemble the Dessert Tacos
- Pipe the cheesecake filling into each taco shell.
- Top with fresh diced strawberries.
- Sprinkle generously with the strawberry crunch topping.
- Optional: finish with whipped cream or a drizzle of strawberry sauce.
Tips & Variations
- Fruit swaps – Try blueberries, peaches, or raspberries for a seasonal twist.
- Chocolate lovers – Add a drizzle of chocolate ganache over the top.
- Kids’ party idea – Offer a “taco bar” with different toppings like sprinkles, crushed cookies, or mini chocolate chips.
- Make-ahead – Prep the shells, filling, and crunch topping separately. Assemble just before serving to keep shells crisp.
How to Store
- Unassembled components – Store cheesecake filling in the fridge (up to 3 days) and taco shells in an airtight container at room temperature (up to 2 days).
- Assembled tacos – Best enjoyed fresh! If stored in the fridge, eat within 24 hours as the shells will soften.
Frequently Asked Questions (FAQ)
Q: Can I make these cheesecake tacos ahead of time?
A: Yes! You can prep the filling and strawberry crunch topping up to 3 days ahead. Assemble just before serving.
Q: Do I have to use Golden Oreos for the topping?
A: No, you can substitute with graham crackers or vanilla wafers if you prefer.
Q: Can I use frozen strawberries?
A: Fresh is best for topping, but frozen (thawed and drained) strawberries can work in a pinch.
Q: How do I make the tacos gluten-free?
A: Use gluten-free tortillas and gluten-free cookies for the crunch topping.
Conclusion
These Strawberry Crunch Cheesecake Tacos combine the creamy indulgence of cheesecake with the fun, hand-held joy of tacos. They’re bright, fruity, and crunchy — the ultimate summer party dessert that looks impressive but comes together in under an hour. Try them once, and they’ll quickly become your go-to treat for gatherings, holidays, or just when you’re craving something special.